
Log window from scratch: basic window
Log window from scratch
Welcome back, dear reader!
In this post we’ll create a basic standalone log window in WPF that we’ll use as the foundation of our project. I recommend you checking out the previous entry in the series if you want to know the motivation or the road map.
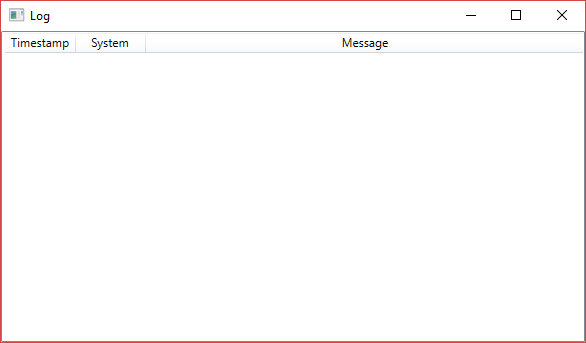
We’ll end up with this, after the post:

Creating the base project
We’re using WPF, so start up your Visual Studio and create a New project.
Under Templates find Visual C# and then select WPF Application. Choose a nice name for your brand new project (and solution) and accept the wizard.
After it finishes loading up, you’ll have a solution with a project and several files. These are the basics of a Windows Presentation Foundation (WPF) project. There are two basic concepts:
- Application: the WPF program itself, the entry point to the framework.
- Window: a piece of UI where controls are displayed so user can interact with the program.
In the project you have three files related to the Application:
App.config: general configuration, metadata and settings for the application (database connection strings, .NET version, …).App.xaml: declares which Window to display as it starts and extra data resources.App.xaml.cs: C# class for this application.
There are also two files related to the Window:
MainWindow.xaml: declares the controls for the window, their properties and some behavior.MainWindow.xaml.cs: C# class for this Window, which will hold its custom logic.
At first, when I started learning the little bit of WPF I know now, it felt like Magic. Where is the entry point defined? There’s no Main function! How does it know which window to display? Hint: it all starts in the Properties page and ends up in the StartupUri of App.xaml.
For now, we’ll just work with these default files and configurations as a standalone WPF project. In the next post, we’ll convert it to a Class Library and will learn how the Application-Window relationship works.
Basic UI controls
Okay, so we have the default WPF stuff. Let’s start creating our UI!
If you remember, the bare minimum we wanted to have a tabular display of the log data. Maybe with three columns:
- Timestamp: can be any kind of timestamp we want from seconds since startup to full date timestamp.
- System/tag: each message can be tagged with a key, like the system it comes from (i.e. net or render).
- Message: the log data itself.
Let’s open the MainWindow.xaml file now. The Designer will open for us showing two panels: one with the graphical representation of our Window and one with the XAML markup. It looks something like this (some names will differ):
<Window x:Class="LogWindowUI.MainWindow"
        xmlns="http://schemas.microsoft.com/winfx/2006/xaml/presentation"
        xmlns:x="http://schemas.microsoft.com/winfx/2006/xaml"
        xmlns:d="http://schemas.microsoft.com/expression/blend/2008"
        xmlns:mc="http://schemas.openxmlformats.org/markup-compatibility/2006"
        xmlns:local="clr-namespace:LogWindowUI"
        mc:Ignorable="d"
        Title="MainWindow" Height="350" Width="525">
    <Grid>

    </Grid>
</Window>
Add a ListView into the XAML panel with this markup:
<Window ...>
    <Grid>
        <ListView x:Name="LogEntryList">
            <ListView.View>
                <GridView>
                    <GridViewColumn Header="Timestamp" Width="70"></GridViewColumn>
                    <GridViewColumn Header="System" Width="70"></GridViewColumn>
                    <GridViewColumn Header="Message" Width="440"></GridViewColumn>
                </GridView>
            </ListView.View>
        </ListView>
    </Grid>
</Window>
And this is how it looks when we run the program:
Alright, we’re on track!
MVVM pattern
So far we’ve just defined how we want our window to look like but it doesn’t do anything just yet. We need to understand how WPF handles data, first.
Although WPF lets you tie your UI and your logic in a tightly-coupled way (code knows which control to update when something happens, control knows which data to update, …), the MVVM way is preferred.
MVVM stands for Model-View-ViewModel and it’s an architectural pattern that helps separate the UI representation (the View) from the program logic and its data (the Model). The ViewModel is kind of a converter from the Model to the View (and handles the presentation logic).
In other words, the Model is connected with the ViewModel, which is connected to the View. Whenever the Model changes, the ViewModel notices and notifies the View to update accordingly. When the user interacts with the View, the ViewModel is modified which, in turn, ends up in an update of the Model.
How does this affect us? Well, first of all, let’s understand which one of them maps to which concept in our program.
Model
For us, each log entry is a Model. It has a timestamp, a system and a message (remember last screenshot?).
In other words, this is our Model:
public class LogEntry
{
public float Timestamp { get; set; }
public string System { get; set; }
public string Message { get; set; }
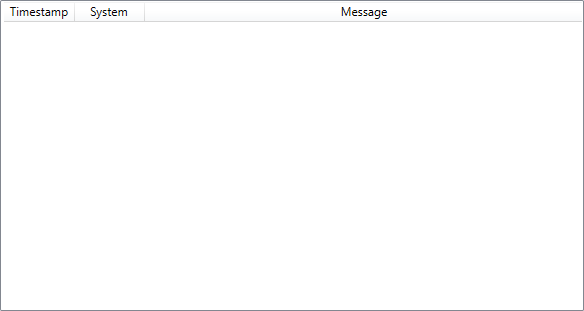
}View
If you have a look at the previous XAML code we’ve listed, you can see we created a ListView called LogEntryList. Suspicious names, huh? If we take last screenshot and only keep our View, we’d have this:
ViewModel
Our LogEntryList control takes any IEnumerable object as its ItemsSource and displays it. The View relies on the ViewModel notifying of a data change to update its visual representation. So, if we used a List<LogEntry> we’d see nothing when we add a new item: it doesn’t notify anyone.
WPF comes with an interesting collection called ObservableCollection<T>. It knows how to notify of a data change in the collection itself (an element is added or removed). So, open MainWindow.xaml.cs and add this property in the MainWindow class:
public ObservableCollection<LogEntry> LogEntries;In this case, we could say that the LogEntry Model is also acting as a ViewModel because we’re using it directly as part of the ObservableCollection. However, we could have a hard separation between the Model and the ViewModel if we were doing more than just showing data (like having extra properties only relevant to the View or a data conversion from the Model to the View).
In future entries of the series we’ll see concrete examples of custom ViewModel.
Displaying logs
Okay, now that we know what’s what, let’s get some messages on screen!
First of all, let’s hardcode a message we’ll display. Open the MainWindow constructor and make it this one:
public MainWindow()
{
    InitializeComponent();

    LogEntries = new ObservableCollection<LogEntry>();

    // tie View with ViewModel
    LogEntryList.ItemsSource = LogEntries;

    // add test data
    LogEntries.Add(new LogEntry
    {
        Timestamp = 0.1f,
        System = "TEST",
        Message = "Hello, codingScars!"
    });
}
When we run the program this is what’s displayed:
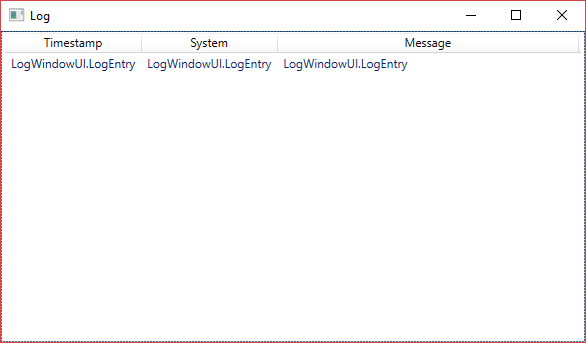
That’s because we haven’t told the View how to display each property of an individual entry. To do so, let’s modify the MainWindow.xaml file and update the ListView control with this code:
<ListView x:Name="LogEntryList">
    <ListView.View>
        <GridView>
            <GridViewColumn Header="Timestamp" Width="70"
                            DisplayMemberBinding="{Binding Timestamp}"></GridViewColumn>
            <GridViewColumn Header="System" Width="70"
                            DisplayMemberBinding="{Binding System}"></GridViewColumn>
            <GridViewColumn Header="Message" Width="440"
                            DisplayMemberBinding="{Binding Message}"></GridViewColumn>
        </GridView>
    </ListView.View>
</ListView>
The DisplayMemberBinding attribute defines which data to display in a column. With the {Binding Message} value, we’re telling WPF to look for a Property called Message in the LogEntry object. Thank Reflection for that! Please note, {Binding ...} is used to connect the View with the ViewModel and it can be done with properties other than DisplayMemberBinding.
Run it again and it will show this:
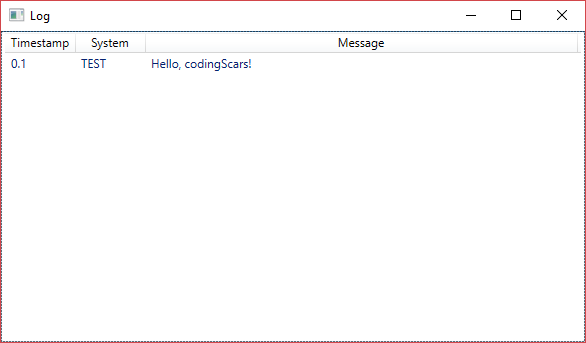
Yay! We’ve got it!
Live update
Okay, okay, we’ve displayed some text, but it’s not displaying anything live. Why don’t we do that now?
First of all, remove the code that adds an entry to the LogEntries collection. Let’s now create a new Thread that will be adding entries to the LogEntries collection.
This is the code:
// add test data
new Thread(() =>
{
    LogEntries.Add(new LogEntry
    {
        Timestamp = 0.1f,
        System = "TEST",
        Message = "Sample message!"
    });
}).Start();
We run it and… boom! The program crashes! Why is that? What does this error mean?
This type of CollectionView does not support changes to its SourceCollection from a thread different from the Dispatcher thread
STA
WPF uses the Single Thread Apartment model. This means that, any object that’s created within a thread can only be modified by that thread. The Application is running in what we call the UI Thread, which is the main one in our case. Because we’ve created our own thread, we can’t modify LogEntries directly: this new thread doesn’t own the collection.
To make it work, let’s change the code to this one:
// add test data
new Thread(() =>
{
    App.Current.Dispatcher.BeginInvoke((Action)delegate
    {
        LogEntries.Add(new LogEntry
        {
            Timestamp = 0.1f,
            System = "TEST",
            Message = "Sample message!"
        });
    });
}).Start();
Run it again and… it works!
Dispatcher
Whenever we want some code to be executed in the UI Thread we can use the Dispatcher object from the Application instance to queue the actions we want to perform.
There are two important methods to queue actions: BeginInvoke is asynchronous and Invoke is synchronous.
Final test
So, now that we know how it works, let’s have a more complete example!
// add test data
new Thread(() =>
{
    long ticks = DateTime.Now.Ticks;
    Random random = new Random();

    for(int i = 0; i < 100; ++i)
    {
        App.Current.Dispatcher.BeginInvoke((Action)delegate
        {
            LogEntries.Add(new LogEntry
            {
                Timestamp = (float) (DateTime.Now.Ticks - ticks) / TimeSpan.TicksPerSecond,
                System = "TEST",
                Message = "Sample message!"
            });
        });

        Thread.Sleep(random.Next() % 100 + 50);
    }
}).Start();
Running it will show something like this:
Phew! Not bad! Good job :)
Through the post we’ve created the foundation of our log window from scratch and learned about the MVVM pattern. In the next post we’ll take this standalone WPF program and make it a Class Library that we can use from a host program.
Thank you for reading! See you then!